
This tutorial is written for beginners. You will install the plugin, wire up a Claude model through ClaudeAPI, and start using an AI coding assistant inside IntelliJ IDEA—one step at a time.
1. Download and install IntelliJ IDEA
Download from the official site: https://www.jetbrains.com/idea/download
IntelliJ IDEA Community is free and is enough for this workflow. Run the installer and follow the prompts.
2. Install the Continue plugin
JetBrains’ built-in AI Assistant requires a paid subscription. We use the Continue plugin instead so you can call a third-party API with your own key—no JetBrains AI subscription required (you pay for API usage through your provider, e.g. ClaudeAPI).
- Open IntelliJ IDEA → menu File → Settings (macOS: IntelliJ IDEA → Settings; older macOS builds may still show Preferences).
- In the left pane, choose Plugins → Marketplace.
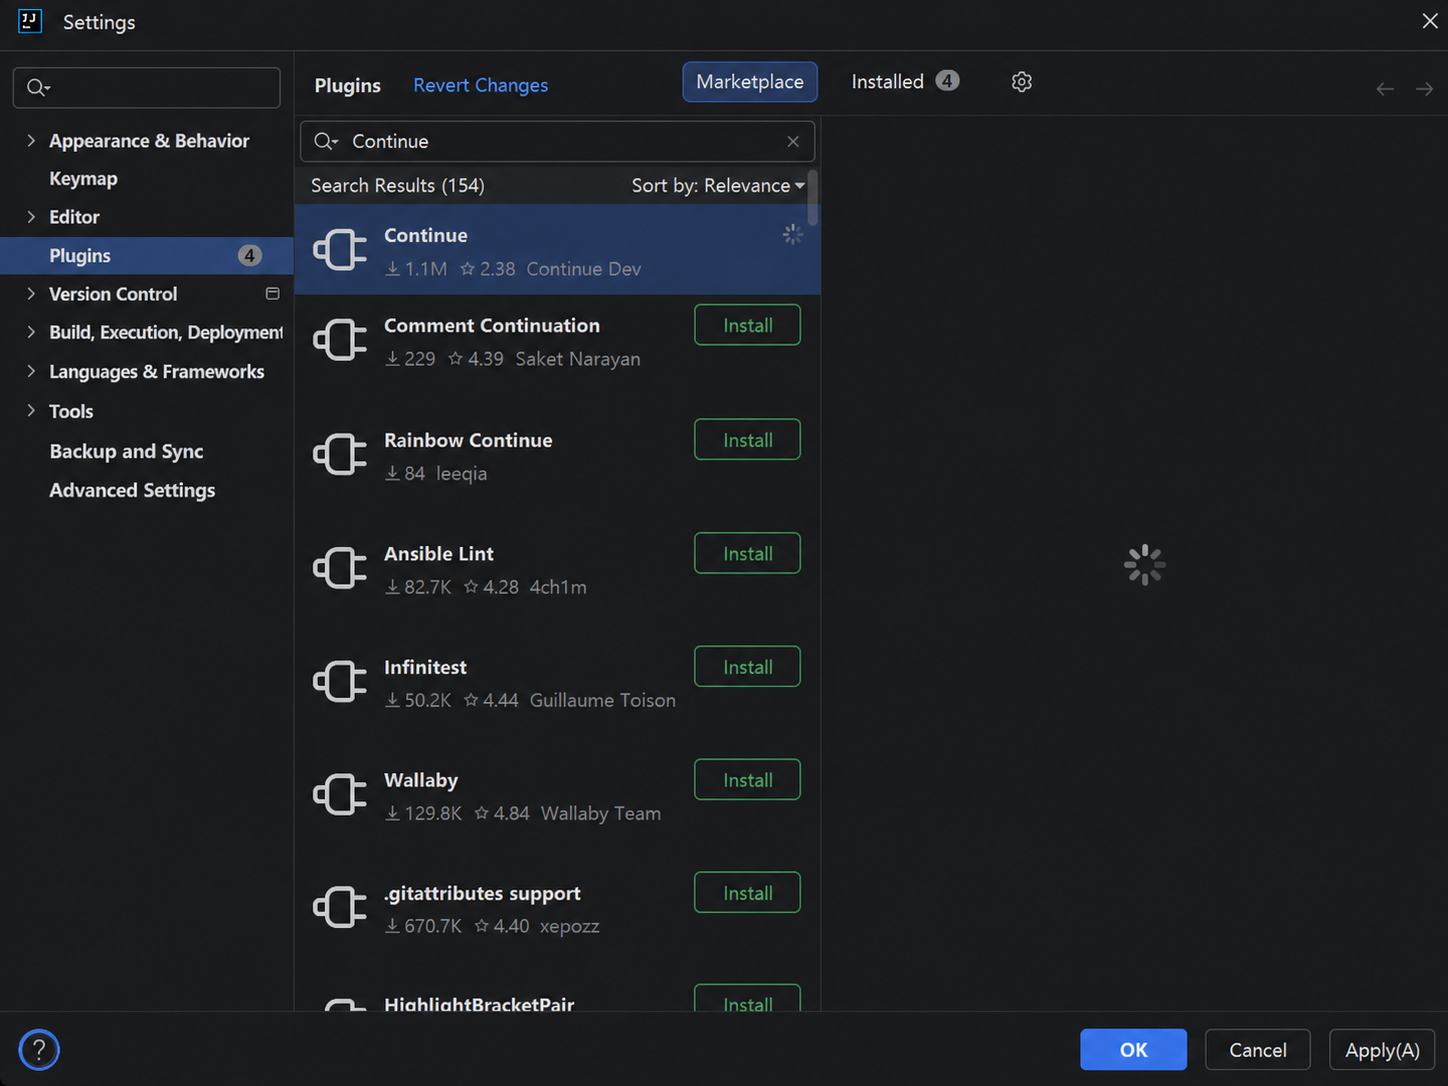
- Search for Continue, then click Install.
- When installation finishes, click Restart IDE.
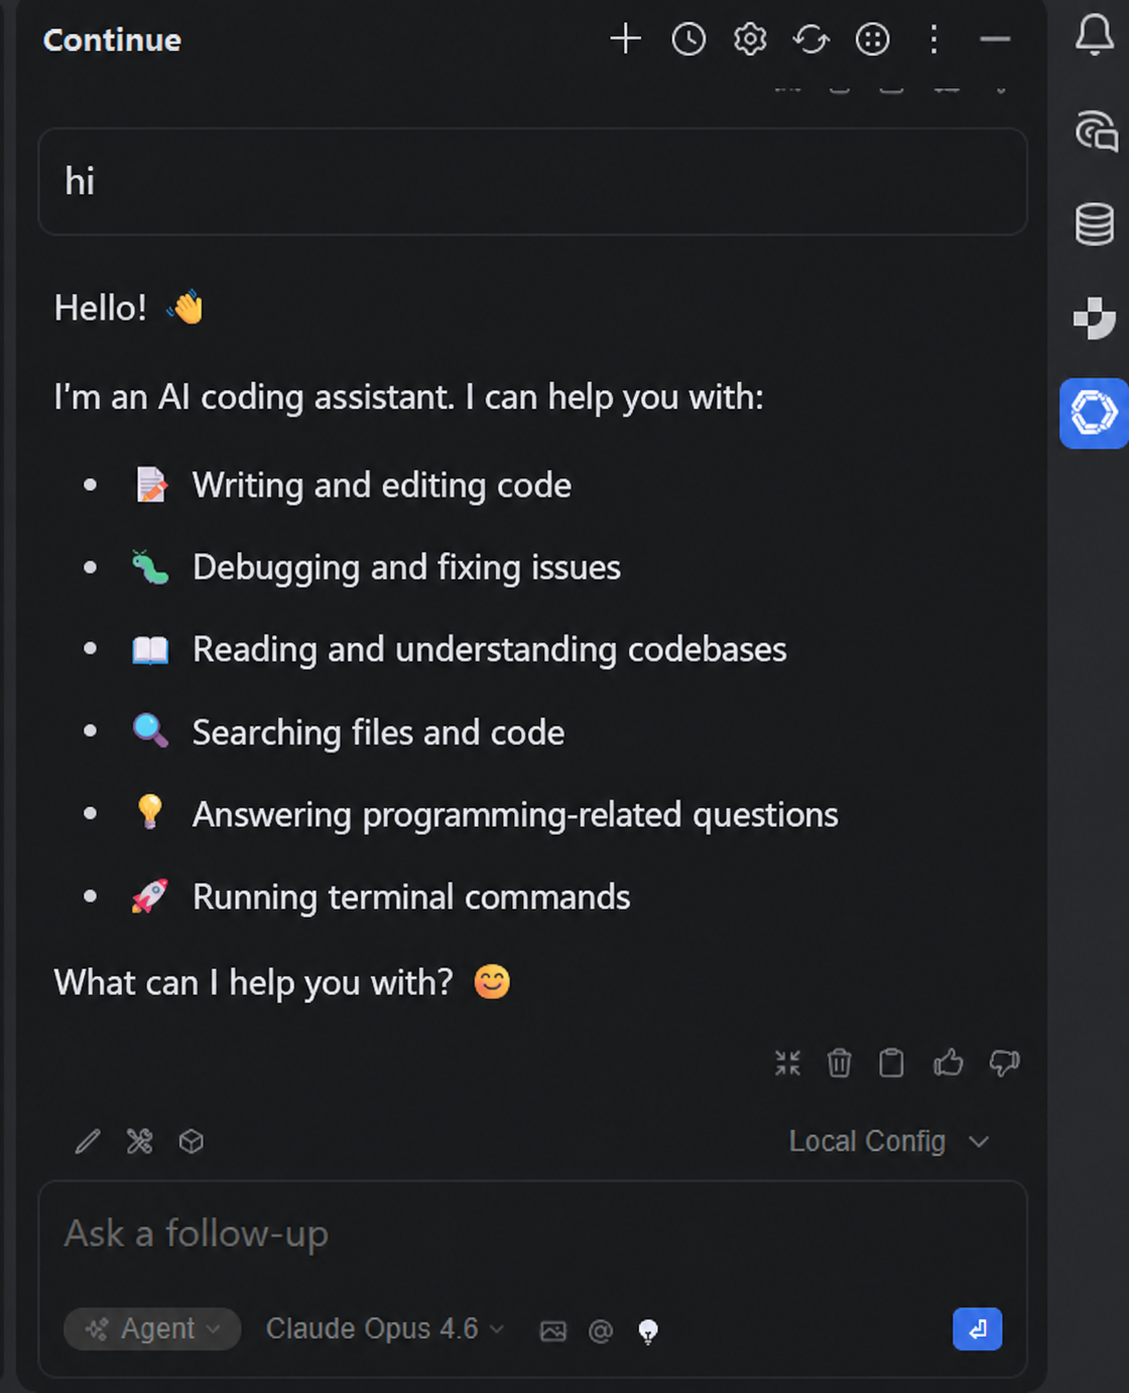
- After restart, look for the Continue icon in the right tool window bar. Click it to open the AI chat panel.
3. Configure a Claude model
This guide uses ClaudeAPI’s OpenAI-compatible HTTP API.
In Continue, set the provider to OpenAI Compatible—not the native Anthropic provider type for this gateway URL.
Option A: Configure in the UI
- Open the Continue tool window.
- Click the gear icon in the lower-right corner to open settings.
- Choose Add Model → Add a model.
- Fill in the fields as follows:
| Field | Value |
|---|---|
| Provider | OpenAI Compatible |
| API Key | Sign in at claudeapi.com, create or copy an API key, and paste it here. |
| Model | e.g. claude-opus-4-6 or claude-sonnet-4-6 |
| API Base | https://gw.claudeapi.com/v1 |
- Click Connect.
- Back in the Continue chat, send:
Reply with exactly one word: OK
Reply with exactly one word: OK
If the model returns OK, the connection is working.
Option B: Edit config.yaml directly
-
Open the Continue tool window.
-
Click the gear icon in the lower-right corner.
-
Choose Open config.yaml.
-
Align your config with the structure below (your file may contain other sections—merge carefully).

name: Local Config
version: 1.0.0
schema: v1

models:
  - name: Claude Opus 4.6
    provider: openai
    model: claude-opus-4-6
    apiKey: sk-xxxxxxxxxxxxxxxxxxxx
    apiBase: https://gw.claudeapi.com/v1

  - name: Claude Sonnet 4.6
    provider: openai
    model: claude-sonnet-4-6
    apiKey: sk-xxxxxxxxxxxxxxxxxxxx
    apiBase: https://gw.claudeapi.com/v1
Replace:
apiKey: sk-xxxxxxxxxxxxxxxxxxxx
apiKey: sk-xxxxxxxxxxxxxxxxxxxx
with the API key from your ClaudeAPI dashboard.
- Save
config.yaml. - In Continue’s model picker (lower-right), choose a model, e.g.:
Claude Opus 4.6
Claude Opus 4.6
- Send a short test message, for example:
Who are you? Answer in one short paragraph in English. Do not repeat my question.
Who are you? Answer in one short paragraph in English. Do not repeat my question.
If you get a sensible reply, setup is complete.
4. Model reference
Check the ClaudeAPI console or model list API for IDs available on your account. Examples that are commonly used in testing:
| Display name | Model ID | Typical use |
|---|---|---|
| Claude Opus 4.6 | claude-opus-4-6 |
High-quality output, harder coding tasks |
| Claude Opus 4.7 | claude-opus-4-7 |
Strong reasoning, high-quality generation |
| Claude Sonnet 4.6 | claude-sonnet-4-6 |
General development; good daily default |
| Claude Haiku 4.5 | claude-haiku-4-5-20251001 |
Fast, lightweight responses |
5. Install the Chinese language pack (optional)
For a Simplified Chinese UI:
- File → Settings → Plugins → Marketplace
- Search Chinese (Simplified) and install the Chinese (Simplified) Language Pack
- Restart the IDE; the UI switches to Chinese.
FAQ
| Symptom | What to try |
|---|---|
| Where is the Continue icon? | After restart, check the right tool window bar, or View → Tool Windows → Continue. |
| HTTP 401 | Wrong or revoked API key, or account permission issue—copy a fresh key from the ClaudeAPI dashboard. |
| HTTP 404 | Check API Base—it should be https://gw.claudeapi.com/v1 (including /v1). |
| HTTP 503 | Temporary upstream or gateway issue—retry later or switch model; check provider status if available. |
| Model echoes my prompt only | Usually wrong provider or base URL—confirm OpenAI-compatible mode and provider: openai with /v1. |
| “Model not found” / invalid model | Copy the exact model ID from ClaudeAPI’s model list, e.g. claude-opus-4-6. |
| Garbled or odd multilingual output | First verify connectivity with Reply with exactly one word: OK, then retry your real prompt. |
CTA
Create an API key in the ClaudeAPI console, set API Base to https://gw.claudeapi.com/v1, and in Continue choose OpenAI Compatible with your ClaudeAPI key.