The Complete Guide to Agent Skills (Claude Code Edition): Build Your AI Agent Skill Library in 6 Steps
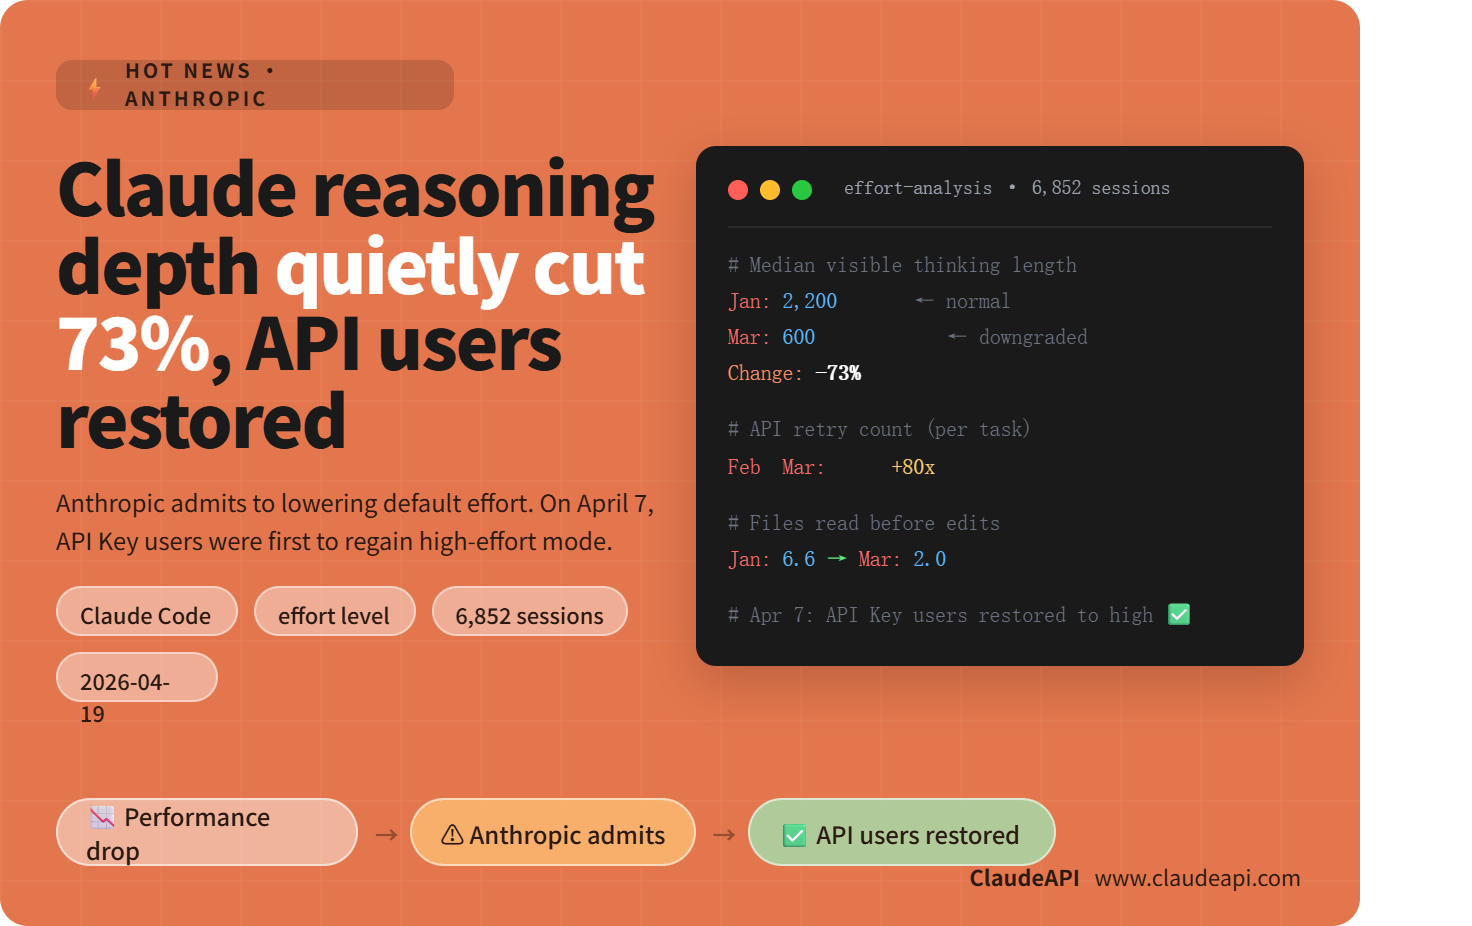
A lot of people hear “Agent Skills” and assume it’s some new model. It’s not. It’s a skill pack mechanism that Anthropic built into Claude Code — you bundle a prompt, some scripts, and reference materials into a folder, and Claude Code automatically discovers and invokes them when needed. Write once, reuse forever.
To get this full pipeline working, you need three things:
- An AI coding IDE that works smoothly — Cursor or VSCode both work; this guide uses the free Antigravity
- Claude Code installed — the official install script usually just works, but Windows PATH issues are common
- Provider switching — the default
api.anthropic.comendpoint may not work well depending on your network; CC-Switch lets you redirect requests to an alternative gateway
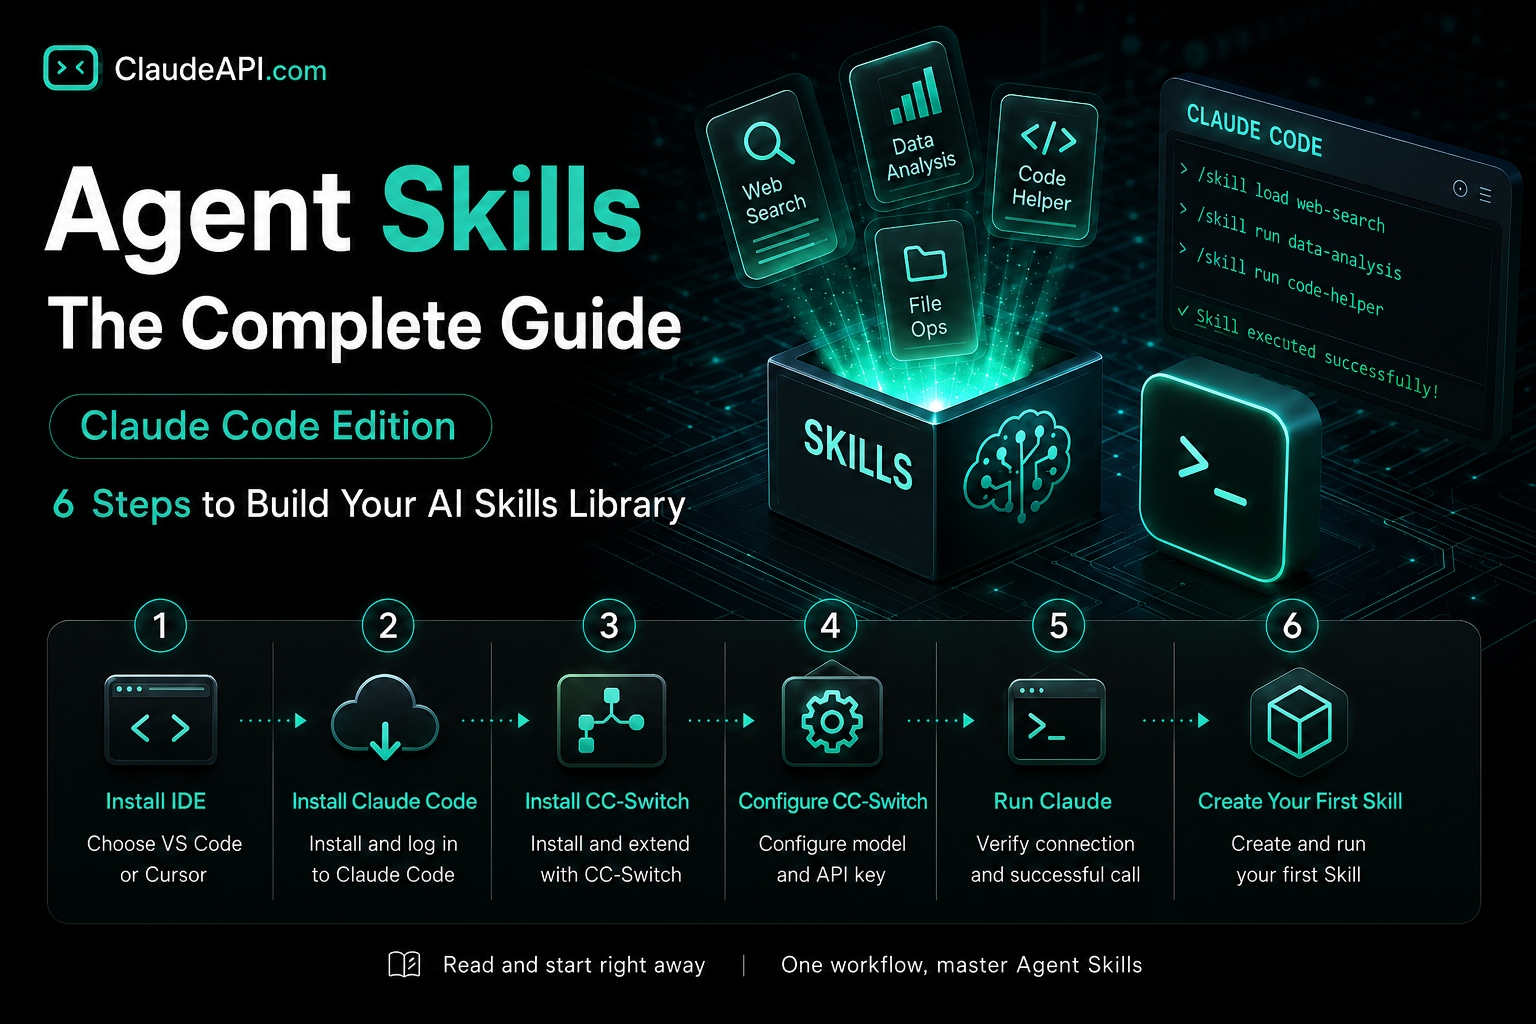
This guide walks you through 6 steps: Install IDE → Install Claude Code → Install CC-Switch → Configure CC-Switch → Verify Claude works → Create your first Skill. By the end, you’ll be up and running.
Roadmap
| Step | Tool | Purpose | Estimated Time |
|---|---|---|---|
| 1 | Antigravity | AI coding IDE — hosts terminal and chat | 5 min |
| 2 | Claude Code | The Agent CLI itself | 5 min |
| 3 | CC-Switch | Multi-provider one-click switching | 2 min |
| 4 | CC-Switch config | Connect to claudeapi.com | 3 min |
| 5 | Enable & verify | Run claude in Antigravity terminal |
2 min |
| 6 | Create a Skill | Write your first Agent Skill | 10 min |
Total: ~30 minutes. Let’s go step by step.
Step 1: Install Antigravity (AI Coding IDE)
You need an AI coding tool to host conversations and a terminal. This guide recommends Antigravity (made by Google, currently free). If you’re already using Cursor / Trae / VSCode, feel free to skip this step.
Steps:
- Visit the Antigravity website and download the installer
- Install (on Windows, just click through the defaults)
- Open Antigravity and go through the onboarding flow
- Sign in with your Google account
- Inside Antigravity, install a language pack if needed (search for your language in extensions)
- Drag the terminal panel to the right side of the screen (optional tip — nice for having chat on the left, execution on the right)
Why sign into Google? Antigravity’s built-in AI assistant requires Google account verification. This step is only for the IDE itself. The actual Claude calls in this guide will all go through CC-Switch to claudeapi.com — no dependency on Google for that.
Step 2: Install Claude Code
Claude Code is Anthropic’s official Agent CLI and the runtime environment for Agent Skills. There are two installation methods — Method A is recommended because you let AI do the work.
Method A: AI-Assisted Installation (Recommended)
-
Open the Claude Code official docs overview page and click the “Copy page” button in the upper right
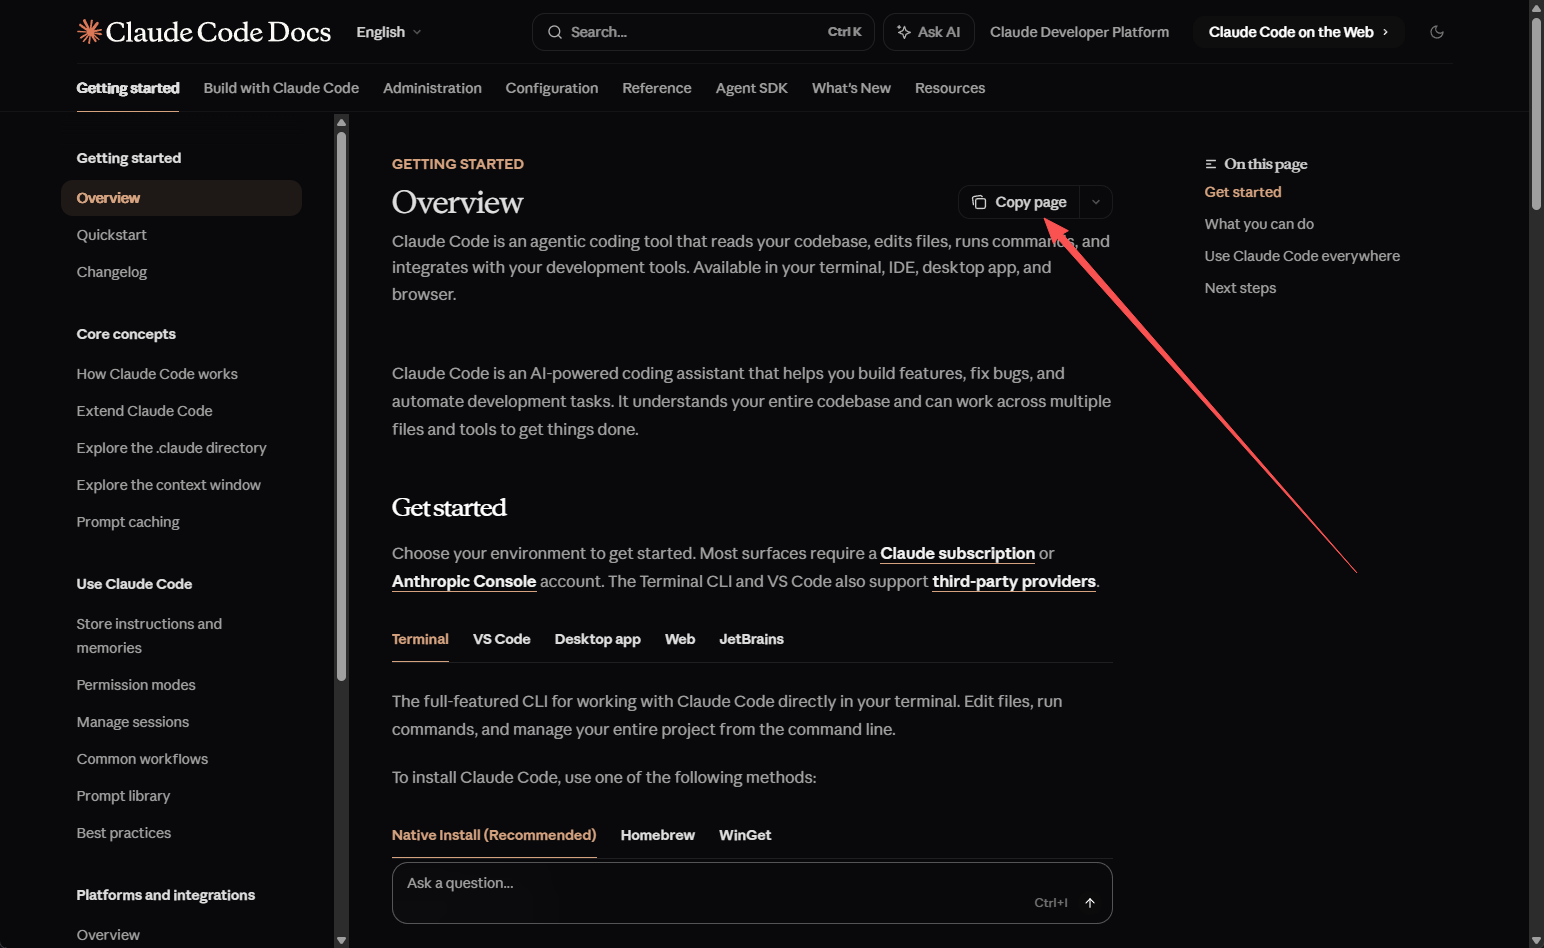
-
Switch to Antigravity and paste into any AI chat input
-
Append this at the end: “Please install Claude Code for me following this documentation”
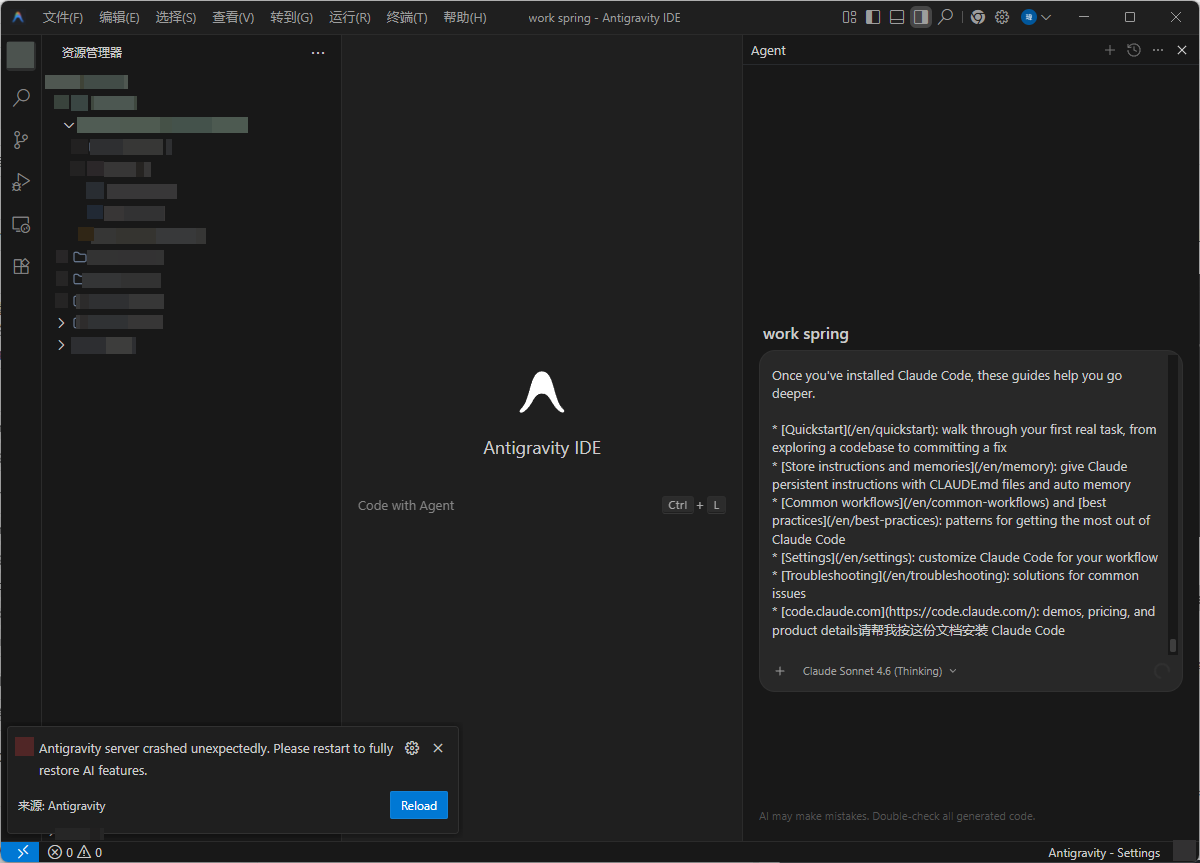
-
Send it and let the AI detect your OS and run the right install commands
The AI will pick the correct script for your operating system and prompt you for a terminal password if needed. Just wait for it to finish.
Method B: Manual Command Installation
If AI installation fails, or you prefer manual control, use the terminal directly:
macOS / Linux / WSL:
curl -fsSL https://claude.ai/install.sh | bash
curl -fsSL https://claude.ai/install.sh | bash
Windows PowerShell:
irm https://claude.ai/install.ps1 | iex
irm https://claude.ai/install.ps1 | iex
Windows CMD:
curl -fsSL https://claude.ai/install.cmd -o install.cmd && install.cmd
curl -fsSL https://claude.ai/install.cmd -o install.cmd && install.cmd
Note (Windows users): If the terminal says it can’t find the
claudecommand after installation, it’s usually a PATH issue. Two fixes:
- Close and reopen the terminal — this alone fixes it most of the time
- If it still doesn’t work, manually add Claude Code’s install directory (default:
%USERPROFILE%\.claude\bin) to your system PATH
After installation, verify in the terminal:
$ claude --version
2.x.x
$ claude --version
2.x.x
If you see a version number, you’re good.
Step 3: Install CC-Switch
CC-Switch is an open-source provider switching tool for Claude Code. It supports one-click switching between multiple providers — official Anthropic, claudeapi.com, GLM, DeepSeek, and more. It works by modifying Claude Code’s environment variables so the claude command hits your chosen endpoint.
Why do you need it? Claude Code defaults to api.anthropic.com. Depending on your network environment, you may want to route through an alternative gateway (like https://gw.claudeapi.com) for better reliability or access. CC-Switch handles this redirection without modifying Claude Code itself.
Steps:
-
Visit the CC-Switch GitHub Releases page
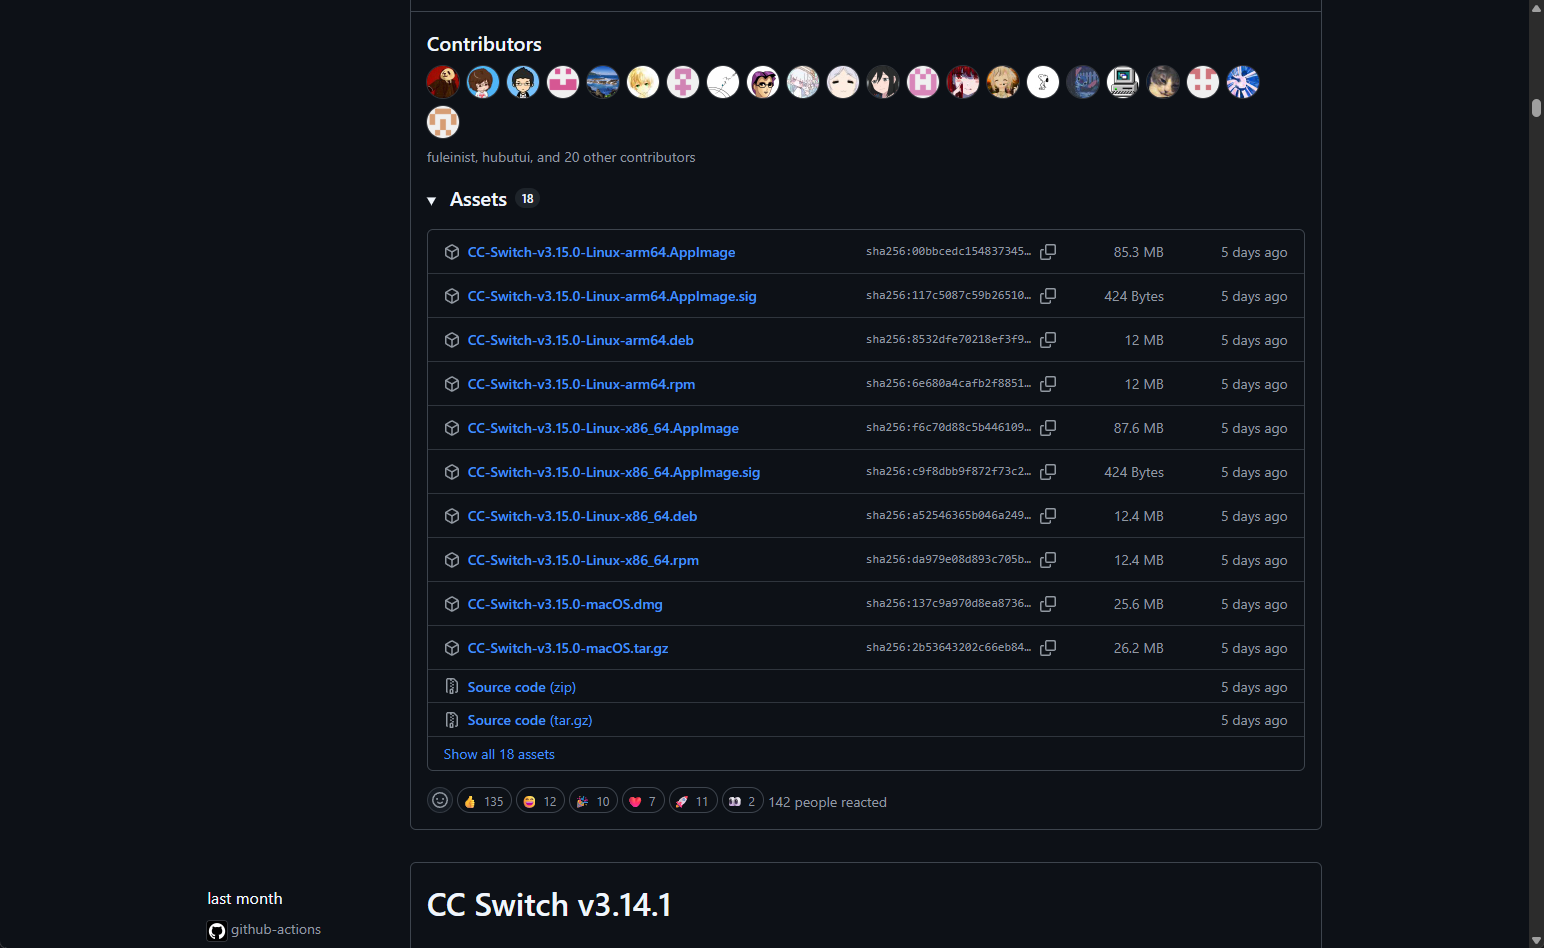
-
Scroll to the Assets section at the bottom
-
Download the installer for your OS:
- macOS: Choose
CC-Switch-vX.X.X-mac.dmg(-arm64for Apple Silicon,-x64for Intel) - Windows: Choose
CC-Switch-vX.X.X-Windows-Setup.exe
- macOS: Choose
-
Install (Windows: just click through the defaults)
After installation, launch CC-Switch from the Start menu / Launchpad. You’ll see a clean provider list interface.
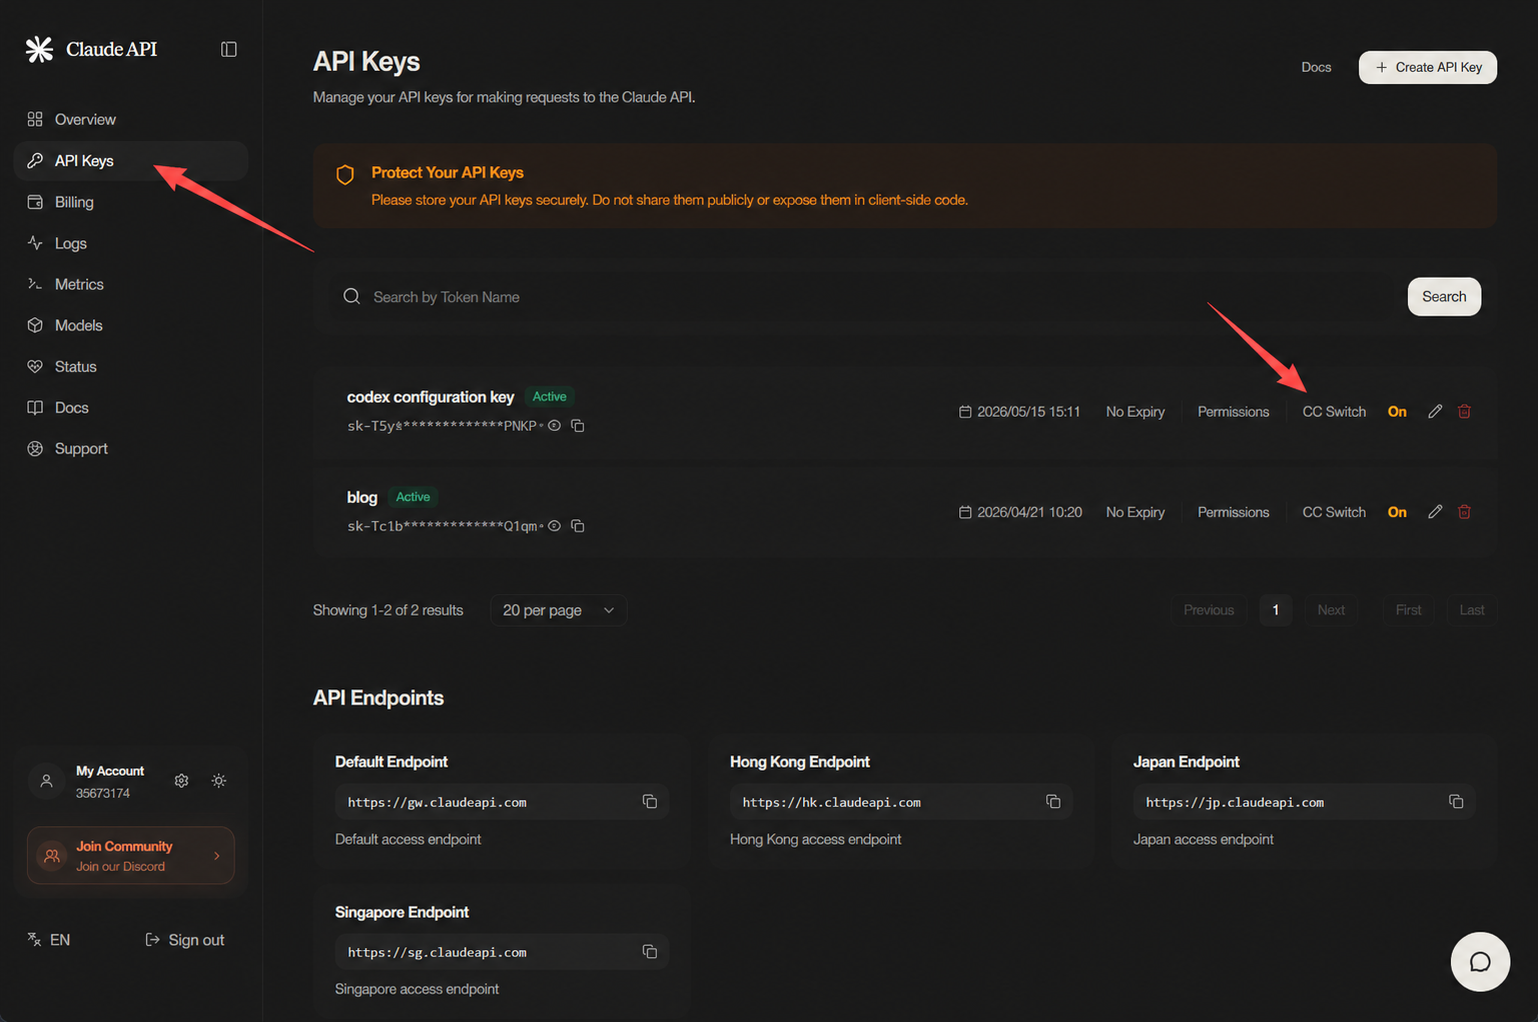
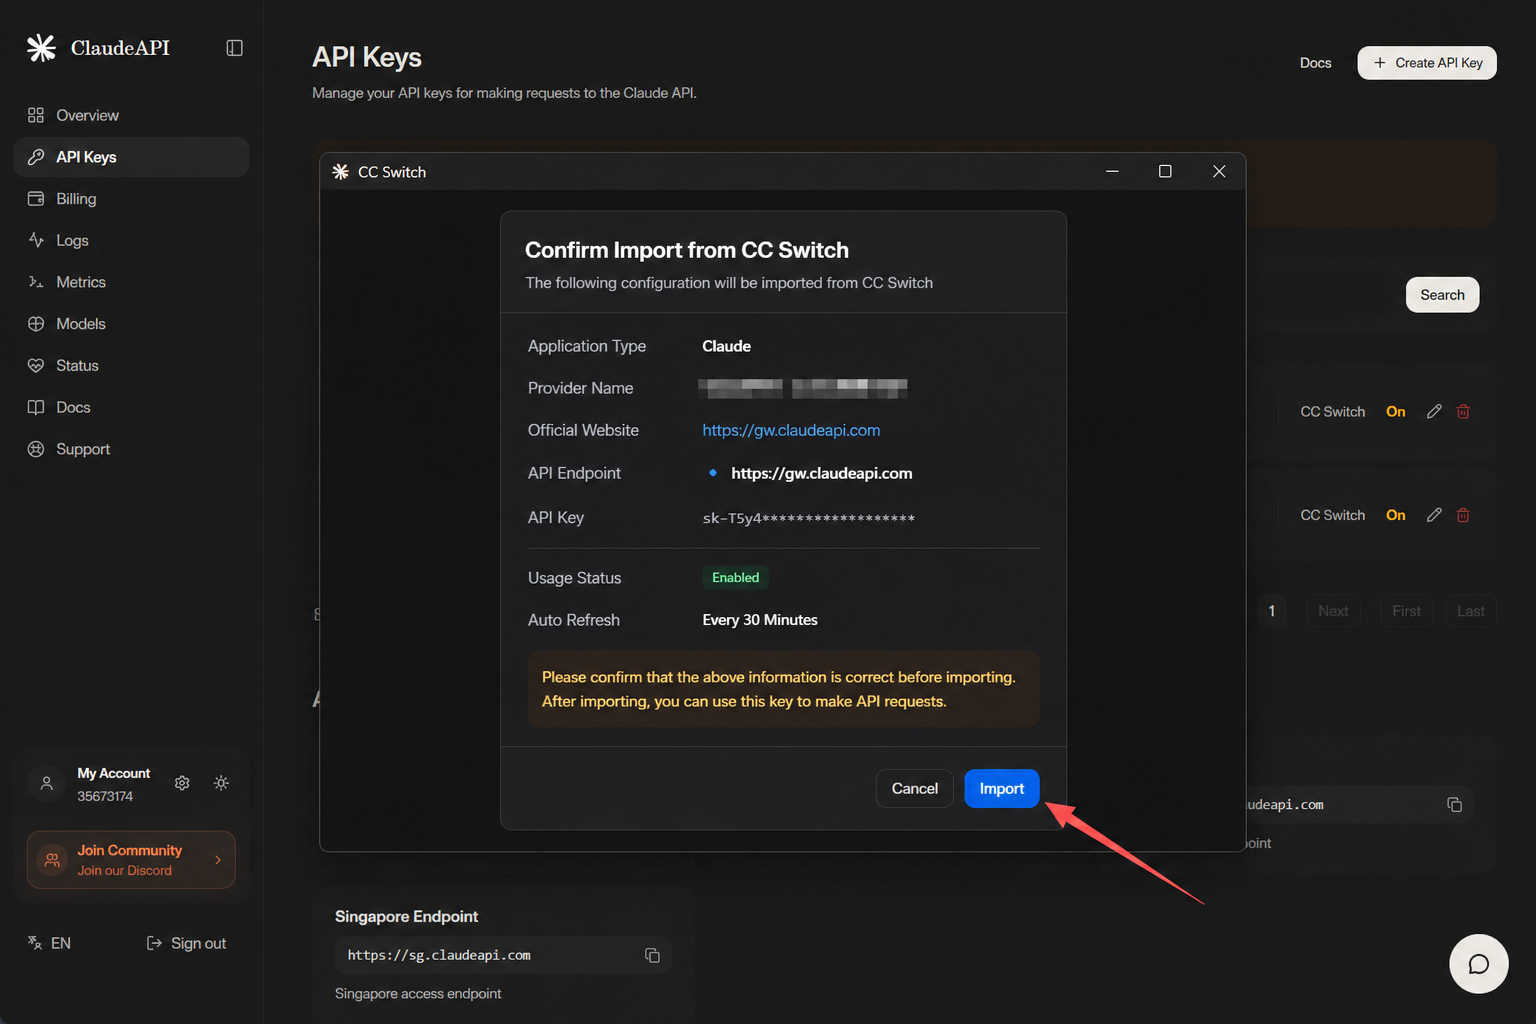
Step 4: Configure CC-Switch
This is the critical step. If the configuration is wrong, Claude Code will ask you to log in with an official Anthropic account — back to square one.
Verify in Antigravity
Go back to Antigravity and open a new terminal (don’t reuse a terminal that was already open before CC-Switch launched — environment variables won’t be injected into old sessions). Type:
claude
claude
After pressing Enter, you should see:
- A prompt to select a theme (Dark / Light)
- The conversation interface with
Welcome to Claude Code
Key check: If
claudelaunches but asks you to log in to an Anthropic account or opens a browser auth page, CC-Switch configuration hasn’t taken effect. Go back to CC-Switch and verify: ① Is the official provider added? ② Is the claudeapi provider enabled? ③ Did you open a new terminal in Antigravity? Check all three, then restart the terminal and try again.
Step 5: Run Your First Conversation
Once you’re inside claude, type any question to verify the full pipeline:
> Write the simplest possible hello world in Python
> Write the simplest possible hello world in Python
Claude should respond almost instantly. If response speed is normal (first token latency under 200ms) and the content is complete, your claudeapi.com connection is working.
At this point, you have a fully functional Claude Code environment. Now let’s get to the real topic — Agent Skills.
Step 6: Understand and Create Your First Agent Skill
6.1 What Is an Agent Skill?
An Agent Skill is a “skill pack” mechanism Anthropic introduced in Claude Code. You package a specific task’s prompts, reference materials, helper scripts, and static assets into a standardized directory, and Claude Code automatically discovers and loads them when relevant.
Here’s an analogy:
| Concept You Know | Agent Skill Equivalent |
|---|---|
| VSCode extension | A Skill directory |
| A prompt template | Instructions in SKILL.md |
| Function parameter annotations | Frontmatter in SKILL.md |
| Function body | Helper scripts in the scripts/ directory |
6.2 Standard Structure of an Agent Skill
your-skill-name/
├── SKILL.md          # Required: main skill file (metadata + instructions)
├── scripts/          # Optional: executable scripts (Python / Shell / Node)
├── references/       # Optional: reference materials (other .md files, loaded on demand)
└── assets/           # Optional: static resources (templates, images, config examples)
The core is SKILL.md — the other three subdirectories are optional. A minimal working Skill only needs a single SKILL.md file.
6.3 Create Your Own Skill
Use qiuzhi-skill-creator to generate your Skill.
Steps:
-
Download qiuzhi-skill-creator: https://ccnk05wgo092.aiforce.cloud/spark/app/app_4jdqh6vm3jpdp/runtime/api/v1/storage/object/bucket_aadjqcshsbyau/1856026206120996.zip
-
Extract qiuzhi-skill-creator into
.claude\skills.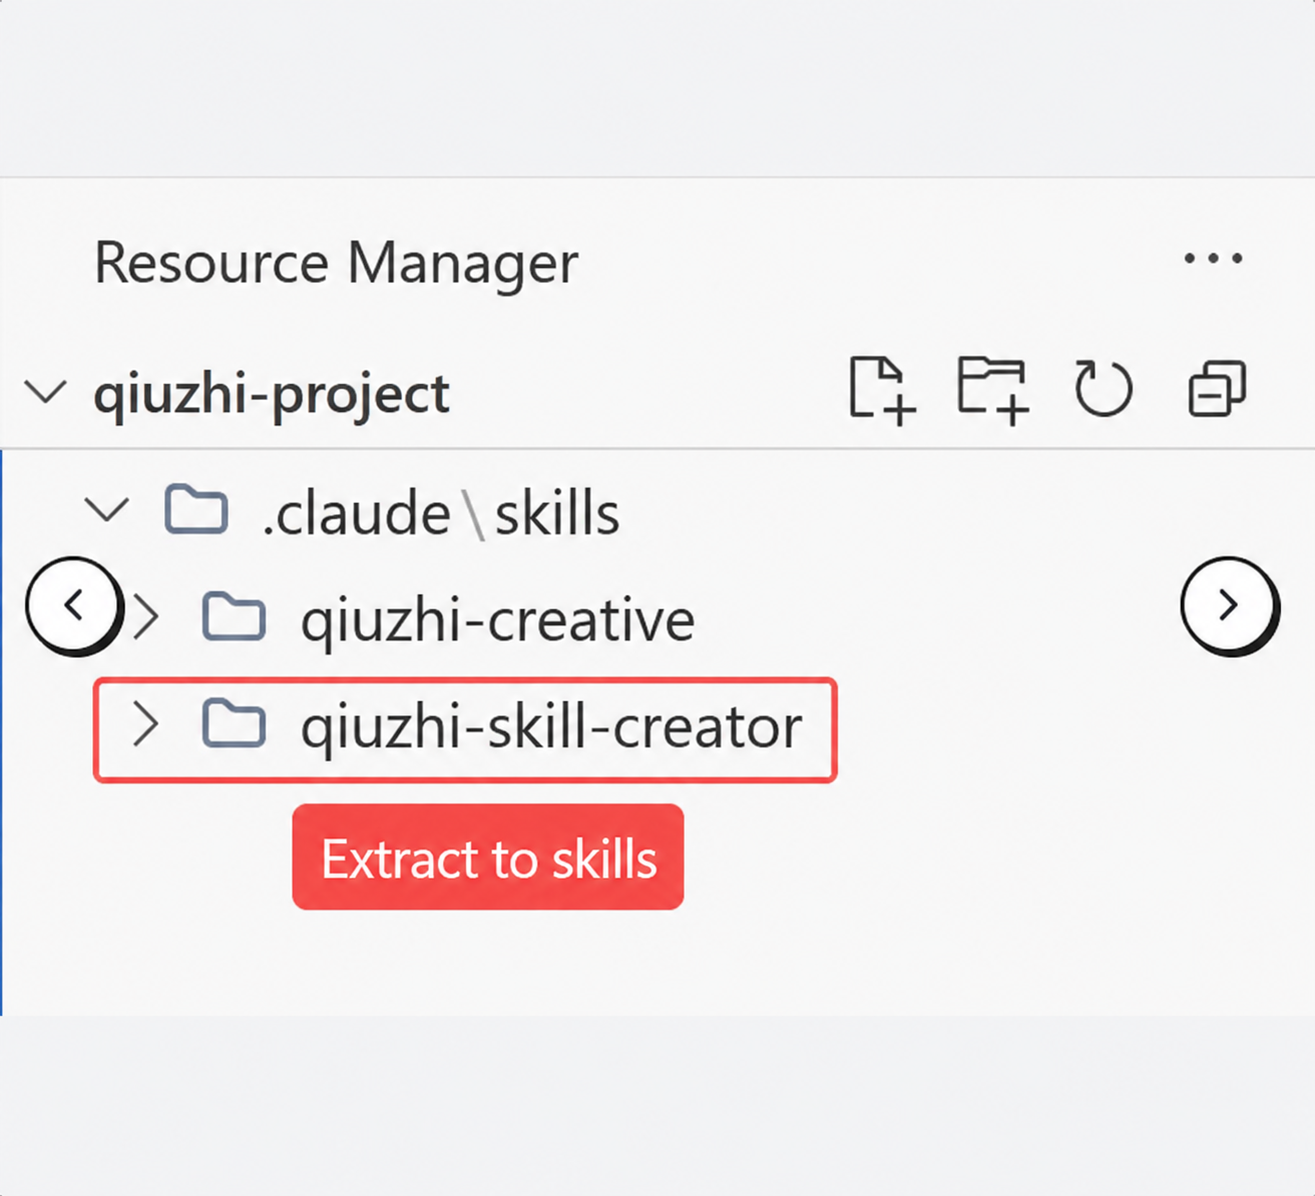
-
In Claude Code, type
/qiuzhiand select qiuzhi-skill-creator. -
Describe what you need, then follow the guided prompts to select or input options.
-
You can drag in reference images and documents.
-
Wait for generation and automatic error fixing.
6.4 Verify the Skill Is Loaded
Go back to the Antigravity terminal, restart claude, and type:
> Using the SKILL.md instructions, write me API documentation for a GET /users endpoint
> Using the SKILL.md instructions, write me API documentation for a GET /users endpoint
If Claude Code responds with a structured Markdown document (endpoint overview, request example, parameter table, response example, error code table), your Skill has been successfully loaded and is working.
Troubleshooting
| Symptom | Cause | Fix |
|---|---|---|
claude asks to log in to Anthropic on launch |
CC-Switch not enabled / terminal is stale | Enable claudeapi in CC-Switch → open a new terminal |
claude: command not found (Windows) |
PATH not applied | Close and reopen terminal; if still broken, manually add to PATH |
| 401 Unauthorized | API Key incorrect or routed through proxy | Check the key is complete, check key group settings, disable global proxy |
| 403 Forbidden | Key doesn’t have a group selected | Go back to console.claudeapi.com, recreate the key with a group selected |
| Slow response / timeout | Routed through proxy or network jitter | Disable proxy — CC-Switch already handles direct routing |
| Skill not activating | Description is too vague | Rewrite as “Use this when the user says X / does Y” with explicit triggers |
| Skill loads but doesn’t follow instructions | SKILL.md instructions aren’t specific enough | Rewrite using numbered lists and step-by-step actions with explicit outputs |
Quick Reference
Environment
├── IDE: Antigravity (or Cursor / VSCode)
├── CLI: Claude Code
└── Switcher: CC-Switch

CC-Switch Provider Config
├── Official provider: https://api.anthropic.com (placeholder, required)
└── Gateway provider:
    ├── Base URL: https://gw.claudeapi.com
    ├── API Key: sk-your-claudeapi-key
    └── Type: Anthropic-compatible

Skill Directory
└── ~/.claude/skills/<skill-name>/
    ├── SKILL.md  (frontmatter + instructions)
    ├── scripts/  (optional)
    ├── references/  (optional)
    └── assets/  (optional)
Wrap-Up
Agent Skills turn “one-off prompts” into “reusable engineering artifacts.” Combined with Claude Code’s tool-calling capabilities, you’re essentially adding a customizable agent layer to your development pipeline. Set up this environment today, and every Skill you write going forward is a long-term investment in your daily workflow.
Developers can connect through claudeapi.com — natively compatible with the Anthropic SDK and Claude Code, supporting Opus 4.7 / Sonnet 4.6 / Haiku 4.5 across the full model lineup, with pay-as-you-go pricing.