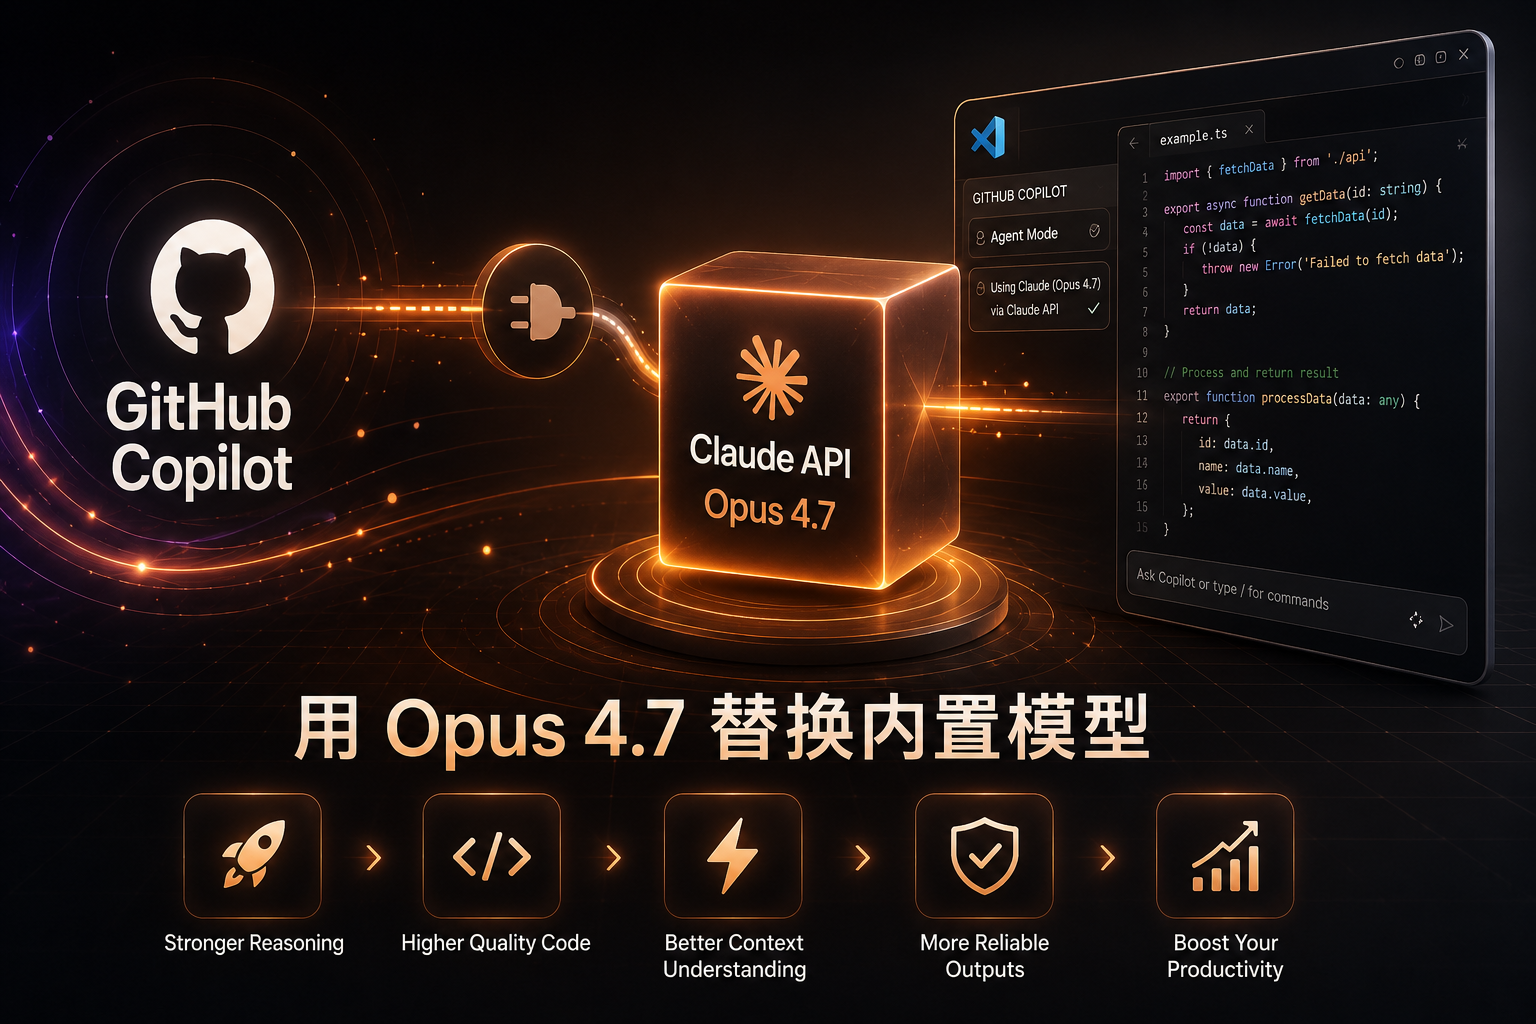
GitHub Copilot 接入 ClaudeAPI 实战:用 Opus 4.7 替换内置模型
GitHub Copilot 默认走 GitHub 自己的模型路由,国内访问不稳,模型版本由 GitHub 选;很多开发者想直接走 Claude Opus 4.7 跑代码生成、Agent 任务,又不想再额外开一份订阅。
GitHub 在 Copilot CLI 里正式开放了 BYOK(Bring Your Own Key)能力,用四个环境变量就能把模型后端切到任意 Anthropic 兼容端点——包括 ClaudeAPI.com。本文给出 Copilot CLI 与 VS Code 内置 Chat 两套接入方案,包含完整的下载、安装、配置、验证步骤,照着走 10 分钟内可跑通。
为什么官方默认配置不够用
Copilot 默认体验绕不开的痛点:
- 国内访问不稳:Copilot CLI 与 VS Code 扩展都走 GitHub 自己的代理路由,常见 401 / 超时
- 模型选择受限:你看到的 “Claude Sonnet” 在 GitHub 后端是哪个版本由它说了算,新模型上线滞后
- 额度被 Agent 吃光:订阅额度大量被自动化 Agent 调用占用,触顶后无法即时扩容
解决方案:把模型后端直接切到 Anthropic 兼容的中转入口。API 协议完全一致,只改一个地址、一个 Key。
本文使用的接入点:
https://gw.claudeapi.com
https://gw.claudeapi.com
API Key 在 claudeapi.com 注册获取,支持支付宝 / 微信充值,注册后即用。
一、注册与准备
- 访问 claudeapi.com,使用手机号或邮箱注册
- 进入 console.claudeapi.com 控制台
- 充值(支持支付宝、微信、对公转账)
- 创建 API Key(必须选择分组),复制
sk-开头的 Key
把 Key 暂存在本地文本编辑器,下面所有步骤都会用到。
二、Copilot CLI 下载与安装
新版 GitHub CLI 已经把 copilot 作为内置子命令集成进来,不再需要单独安装 gh-copilot 扩展。
⚠️ 不要再执行
gh extension install github/gh-copilot,新版gh会报:copilot matches the name of a built-in command or alias
官网下载:
- GitHub CLI 官网:https://cli.github.com/
- GitHub CLI Releases:https://github.com/cli/cli/releases
- Copilot CLI BYOK 文档:https://docs.github.com/en/copilot/how-tos/copilot-cli/customize-copilot/use-byok-models
2.1 安装 GitHub CLI
| 平台 | 命令 |
|---|---|
| macOS | brew install gh |
| Windows | winget install --id GitHub.cli 或 scoop install gh |
| Ubuntu / Debian | sudo apt install gh(需先添加 GitHub CLI APT 源,详见官网) |
| Fedora / RHEL | sudo dnf install gh |
| Arch | sudo pacman -S github-cli |
版本要求:gh ≥ 2.60(内置 copilot 子命令的最低版本)。验证:
gh --version
gh --version
2.2 验证 Copilot 子命令可用
直接调用内置入口,不需要也不应该再执行 gh extension install:
gh copilot -- --help
gh copilot -- --help
正常输出会列出 -p / --prompt、--stream、--no-color、--secret-env-vars 等参数。如果输出的是 copilot matches the name of a built-in command or alias,说明你残留了旧的 gh-copilot 扩展,需要先移除:
gh extension remove gh-copilot
gh extension remove gh-copilot
关于订阅:在 BYOK 模式下,模型推理由你配置的自定义 provider(如 ClaudeAPI)承担。本机
gh copilot help providers明确写着:GitHub authentication is not required when using a custom provider. 也就是说自定义 provider 的 API Key 才是模型调用的前提,GitHub Copilot 订阅不是必须项;但部分高级功能(仓库索引、企业策略等)仍依赖 GitHub 登录态。
三、Copilot CLI 配置(推荐方案)
通过四个环境变量切到 BYOK 模式。
3.1 字段说明
| 字段 | 填写内容 | 说明 |
|---|---|---|
COPILOT_PROVIDER_TYPE |
anthropic |
走 Anthropic 原生协议,不要写 openai |
COPILOT_PROVIDER_BASE_URL |
https://gw.claudeapi.com |
末尾不要加 /v1,Anthropic 协议根路径 |
COPILOT_PROVIDER_API_KEY |
sk-你的ClaudeAPI密钥 |
ClaudeAPI.com 创建的 Key |
COPILOT_MODEL |
claude-opus-4-7 |
必须显式指定,CLI 不能从中转端点自动发现模型列表 |
3.2 完整环境变量配置
macOS / Linux(写入 ~/.zshrc 或 ~/.bashrc):
# === GitHub Copilot CLI BYOK:接入 ClaudeAPI ===
export COPILOT_PROVIDER_TYPE="anthropic"
export COPILOT_PROVIDER_BASE_URL="https://gw.claudeapi.com"
export COPILOT_PROVIDER_API_KEY="sk-你的ClaudeAPI密钥"
export COPILOT_MODEL="claude-opus-4-7"
# === GitHub Copilot CLI BYOK:接入 ClaudeAPI ===
export COPILOT_PROVIDER_TYPE="anthropic"
export COPILOT_PROVIDER_BASE_URL="https://gw.claudeapi.com"
export COPILOT_PROVIDER_API_KEY="sk-你的ClaudeAPI密钥"
export COPILOT_MODEL="claude-opus-4-7"
写入后让配置立即生效:
source ~/.zshrc # 或 source ~/.bashrc
source ~/.zshrc # 或 source ~/.bashrc
Windows PowerShell(临时,当前会话生效):
$env:COPILOT_PROVIDER_TYPE = "anthropic"
$env:COPILOT_PROVIDER_BASE_URL = "https://gw.claudeapi.com"
$env:COPILOT_PROVIDER_API_KEY = "sk-你的ClaudeAPI密钥"
$env:COPILOT_MODEL = "claude-opus-4-7"
$env:COPILOT_PROVIDER_TYPE = "anthropic"
$env:COPILOT_PROVIDER_BASE_URL = "https://gw.claudeapi.com"
$env:COPILOT_PROVIDER_API_KEY = "sk-你的ClaudeAPI密钥"
$env:COPILOT_MODEL = "claude-opus-4-7"
Windows PowerShell(永久写入用户环境变量):
[System.Environment]::SetEnvironmentVariable("COPILOT_PROVIDER_TYPE", "anthropic", "User")
[System.Environment]::SetEnvironmentVariable("COPILOT_PROVIDER_BASE_URL", "https://gw.claudeapi.com", "User")
[System.Environment]::SetEnvironmentVariable("COPILOT_PROVIDER_API_KEY", "sk-你的ClaudeAPI密钥", "User")
[System.Environment]::SetEnvironmentVariable("COPILOT_MODEL", "claude-opus-4-7", "User")
注意:写入用户级环境变量后需重启终端才能生效。
Windows CMD(临时):
set COPILOT_PROVIDER_TYPE=anthropic
set COPILOT_PROVIDER_BASE_URL=https://gw.claudeapi.com
set COPILOT_PROVIDER_API_KEY=sk-你的ClaudeAPI密钥
set COPILOT_MODEL=claude-opus-4-7
set COPILOT_PROVIDER_TYPE=anthropic
set COPILOT_PROVIDER_BASE_URL=https://gw.claudeapi.com
set COPILOT_PROVIDER_API_KEY=sk-你的ClaudeAPI密钥
set COPILOT_MODEL=claude-opus-4-7
3.3 选择模型
可填入 COPILOT_MODEL 的模型 ID:
claude-opus-4-7
claude-opus-4-6
claude-sonnet-4-6
claude-haiku-4-5-20251001
claude-opus-4-7
claude-opus-4-6
claude-sonnet-4-6
claude-haiku-4-5-20251001
| 场景 | 推荐 |
|---|---|
| 复杂代码、架构设计、长上下文 | claude-opus-4-7 |
| 日常补全、单文件编辑 | claude-sonnet-4-6(性价比甜点) |
| 大批量分类 / 注释生成 | claude-haiku-4-5-20251001 |
模型要求:必须支持 tool calling 与 streaming,且上下文窗口 ≥ 128k。上述四个 ID 全部满足。
3.4 验证连通性(必跑)
步骤 1:先用 HTTP 直接打 base_url,确认 Key + 端点正常。
macOS / Linux 用 cURL:
curl https://gw.claudeapi.com/v1/messages \
  -H "x-api-key: sk-你的ClaudeAPI密钥" \
  -H "anthropic-version: 2023-06-01" \
  -H "content-type: application/json" \
  -d '{
    "model": "claude-opus-4-7",
    "max_tokens": 256,
    "messages": [{"role": "user", "content": "只回复 pong"}]
  }'
curl https://gw.claudeapi.com/v1/messages \
  -H "x-api-key: sk-你的ClaudeAPI密钥" \
  -H "anthropic-version: 2023-06-01" \
  -H "content-type: application/json" \
  -d '{
    "model": "claude-opus-4-7",
    "max_tokens": 256,
    "messages": [{"role": "user", "content": "只回复 pong"}]
  }'
Windows PowerShell 推荐用 Invoke-RestMethod,超时设长一点(避免 Windows 默认 100s 超时切断长响应):
$headers = @{
  "x-api-key"         = "sk-你的ClaudeAPI密钥"
  "anthropic-version" = "2023-06-01"
  "content-type"      = "application/json"
}
$body = @{
  model      = "claude-opus-4-7"
  max_tokens = 256
  messages   = @(@{ role = "user"; content = "只回复 pong" })
} | ConvertTo-Json -Depth 5

Invoke-RestMethod -Method Post `
  -Uri "https://gw.claudeapi.com/v1/messages" `
  -Headers $headers `
  -Body $body `
  -TimeoutSec 120
验证标准(不要写死返回内容):
- HTTP 状态码 200
- 响应 JSON 里
content数组至少有一个type: "text"元素,且text非空 model字段与你请求的模型 ID 一致
模型实际返回的文本是自然语言,可能是 pong、Pong!、好的,pong。 等多种形式;只要满足上述三点就说明端点 + Key 工作正常。不要把 max_tokens 设得太小(建议 ≥ 128),否则正常输出会被截断。
步骤 2:跑一次 Copilot 命令:
gh copilot -- -p "只给出一个 PowerShell 命令:查找当前目录所有大于 100MB 的文件。不要解释。"
gh copilot -- -p "只给出一个 PowerShell 命令:查找当前目录所有大于 100MB 的文件。不要解释。"
⚠️ 旧版的
gh copilot suggest "..."现在会报 Invalid command format,已被新版的gh copilot -- -p "..."语法取代。--之后的所有参数会原样传给 copilot 子进程。
实测返回示例:
Get-ChildItem -Recurse -File | Where-Object { $_.Length -gt 100MB }
Get-ChildItem -Recurse -File | Where-Object { $_.Length -gt 100MB }
只要回包是一条可执行的命令、退出码为 0,就说明 Copilot CLI 已经走 ClaudeAPI.com 跑通了。
如果想跑一个最小连通性自检(关流式、避免颜色码污染输出、屏蔽 Key 日志):
gh copilot -- -p "只回复 pong" --no-color --stream off --secret-env-vars=COPILOT_PROVIDER_API_KEY
gh copilot -- -p "只回复 pong" --no-color --stream off --secret-env-vars=COPILOT_PROVIDER_API_KEY
验证时同样只看:进程退出码 0 + 标准输出包含非空文本,不要断言输出必须等于 pong。
断网模式:Copilot CLI 在 BYOK 下默认仍会与 GitHub 服务器通信完成 embeddings、仓库索引、意图识别等任务,模型推理才走自定义端点。如果需要完全离线,参考 https://docs.github.com/en/copilot/how-tos/copilot-cli/customize-copilot/use-byok-models 中的 offline mode 配置(需要本地模型)。
四、Copilot SDK 编程接入(高级,可选)
如果你在自建工具里嵌入 Copilot Agent 能力,用 Copilot SDK 直接配置 provider:
SDK 仓库:https://github.com/github/copilot-sdk
import { CopilotAgent } from "@github/copilot-sdk";

const agent = new CopilotAgent({
  provider: {
    type: "anthropic",
    baseUrl: "https://gw.claudeapi.com",
    apiKey: process.env.COPILOT_PROVIDER_API_KEY!,
  },
  model: "claude-opus-4-7",
});

const session = await agent.createSession({
  systemPrompt: "你是一个资深 TypeScript 开发助手",
});

const response = await session.send({
  message: "帮我把这个回调风格的函数改成 async/await:...",
});

console.log(response.text);
SDK 同样要求模型支持 tool calling + streaming + ≥128k 上下文,常规 Claude 4.x 模型都满足。
五、常见问题
| 错误 | 原因 | 解决 |
|---|---|---|
| 401 Unauthorized | Key 错误 / 走了全局代理 | 检查 Key;关闭系统代理或将 gw.claudeapi.com 加入代理排除 |
| 403 Forbidden | Key 未选分组 | 控制台重新创建 Key 时勾选分组 |
| 404 Not Found | COPILOT_PROVIDER_BASE_URL 写成了 https://gw.claudeapi.com/v1 |
Anthropic 协议下 base_url 末尾不加 /v1,OpenAI 协议才加 |
| 429 Too Many Requests | 并发超限 | 降低并发;控制台切换分组或升档 |
model does not support tool calling |
把不支持 function calling 的模型 ID 填到 COPILOT_MODEL |
改回上面四个推荐 ID |
model context window too small |
选了 ≤ 64k 上下文窗口的模型 | 改为 claude-opus-4-7 / claude-sonnet-4-6(均 ≥ 200k) |
gh copilot suggest "..." 报 Invalid command format |
旧版语法已废弃 | 改用新版语法:gh copilot -- -p "你的需求" |
gh copilot -- -p 命令半天无响应 |
环境变量未生效 | 检查:echo $COPILOT_PROVIDER_BASE_URL(PowerShell:echo $env:COPILOT_PROVIDER_BASE_URL)是否为空;如为空,重启终端 |
gh extension install github/gh-copilot 报 copilot matches the name of a built-in command or alias |
新版 gh 已内置 copilot 子命令,不再需要扩展 |
跳过 install 步骤,直接 gh copilot -- --help 验证 |
| Streaming 中途中断 | 网络抖动 / 上游过载 | 重试;或临时切到 Sonnet 4.6 |
VS Code 看不到 Add Models 入口 |
企业策略未开启 / VS Code 版本过低 | 升级到 ≥ 1.94;企业账号让管理员开 BYOK 策略 |
六、配置速查
GitHub Copilot CLI BYOK
├── COPILOT_PROVIDER_TYPE: anthropic
├── COPILOT_PROVIDER_BASE_URL: https://gw.claudeapi.com   (不加 /v1)
├── COPILOT_PROVIDER_API_KEY: sk-你的ClaudeAPI密钥
└── COPILOT_MODEL: claude-opus-4-7
GitHub Copilot CLI BYOK
├── COPILOT_PROVIDER_TYPE: anthropic
├── COPILOT_PROVIDER_BASE_URL: https://gw.claudeapi.com   (不加 /v1)
├── COPILOT_PROVIDER_API_KEY: sk-你的ClaudeAPI密钥
└── COPILOT_MODEL: claude-opus-4-7
下载链接清单:
| 资源 | 链接 |
|---|---|
| GitHub CLI 官网 | https://cli.github.com/ |
| GitHub CLI Releases | https://github.com/cli/cli/releases |
| gh-copilot 扩展 | https://github.com/github/gh-copilot |
| Copilot SDK | https://github.com/github/copilot-sdk |
| VS Code 下载 | https://code.visualstudio.com/Download |
| Copilot CLI BYOK 文档 | https://docs.github.com/en/copilot/how-tos/copilot-cli/customize-copilot/use-byok-models |
| Copilot 企业 BYOK 策略 | https://docs.github.com/en/copilot/how-tos/administer-copilot/manage-for-enterprise/use-your-own-api-keys |
| VS Code Language Models | https://code.visualstudio.com/docs/copilot/customization/language-models |
小结
Copilot CLI 的 BYOK 是 GitHub 给开发者留的官方口子——四个环境变量、一段 base_url,Copilot 就跑在 Claude Opus 4.7 上。
流程闭环:注册 ClaudeAPI Key → 装 gh(新版已内置 copilot 子命令,不再需要 gh-copilot 扩展)→ 设四个环境变量 → cURL / Invoke-RestMethod 验证端点 → gh copilot -- -p "..." 验证 Copilot。
如需接入 Claude 最新模型,访问 claudeapi.com 注册即可使用